Technique Tuesday Blog Hop | Simple Stamping with Gift of Giving

Hello! Welcome to StampinByHannah for this months Technique Tuesday blog hop! This month we are Simple Stamping… which sounds like it would be easy, but I don’t really think I’ve managed it with this card which includes colouring with Watercolour Pencils and Masking! But, I love it… so I’m sharing it regardless!

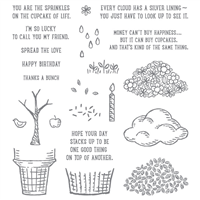
I’m really enjoying this new stamp set from the September-December Mini Catalogue (out tomorrow!), it great for a bit of colouring but is really lovely just simply stamped too. Here I stamped Santa in Memento Black ink and then coloured him with Watercolour Pencils. I haven’t added any water to this though, because I wanted a sketchy look.

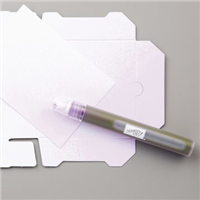
Once he was coloured in I cut a mask from a bit of sticky note (you could use Masking paper… I just use what I had on hand!) by stamping the image again and fussy cutting it. Then used this to cover Santa while I ink blended some Real Red ink into the corner.

Thanks so much for stopping by today, but before you leave StampinByHannah today, please do consider subscribing to my emails, or following me on Instagram!

Shop Stampin' Up! UK Teesside North East Stockton on Tees
Joining Stampin' Up! UK Starter Kit

To purchase any of the items featured in my projects please use the links above. To join my team of Stampin’ Friends select ‘Join My Team’ or send me a message!

Sign up to my newsletter for weekly updates from me!

Hannah McCurley

Technique Tuesday Blog Hop | Designer Series Paper

Hello! Welcome to StampinByHannah for the Crafty Collaborations Technique Tuesday Blog Hop. This month our technique is to use Designer Series Paper. I LOVE Designer Series Paper, I know some people struggle to cut their paper, but I really love to use it! Although, I like using little pieces… very much like on today’s card.

This card was inspired by THIS card by Kaylee Den Breejen. Kaylee’s card used coloured Designer Series Paper, but I am really enjoying using black and white at the moment, and the Zoo Crew Designer Series Paper.

The stamped image here is from the coordinating stamp set, Zany Zoo, coloured using Moody Mauve Stampin’ Blends.

Thanks so much for stopping by today, but before you leave StampinByHannah today, please do consider subscribing to my emails, or following me on Instagram!

Shop Stampin' Up! UK Teesside North East Stockton on Tees
Joining Stampin' Up! UK Starter Kit

To purchase any of the items featured in my projects please use the links above. To join my team of Stampin’ Friends select ‘Join My Team’ or send me a message!

Sign up to my newsletter for weekly updates from me!

Hannah McCurley

Technique Tuesday Blog Hop | Heat Embossing with Beautifully Happy from Stampin’ Up!

Hello! Welcome to StampinByHannah! This month’s Technique is Heat Embossing… probably something I do on about 80% of my projects, I just LOVE it! Nothing better that a sentiment heat embossed in White on a piece of Basic Black card stock! But, I haven’t done that today.

This card is a bit special, as I made it for my aunt’s 70th birthday this month (I know she wont see this… so I’m not worried about sharing before the big day!). I had a lot of fun watercolouring this image. It’s from the brand new Beautifully Happy stamp set which is FREE with a £90 order during Sale-a-bration which starts on Thursday.

Hand stamped Birthday card using Beautifully Happy from Stampin' Up! Sale-a-bration 2023 with StampinByHannah

Both the image and the sentiment are heat embossed in Gold. This is one of my watercolour top tips actually, to heat emboss the image because it sort of keeps the ink where you want it, and makes watercolour a bit easier.

The flower is coloured with Pear Pizzazz, Blushing Bride, Flirty Flamingo and Orchid Oasis. I wasn’t sure when I pulled the colours off my shelf, but now I really like it.

The frame is from Framed Florets, and the background is stamped in Pear Pizzazz onto Pear Pizzazz card stock using one of the more solid stamps from the set.

Thanks so much for stopping by today, but before you leave StampinByHannah today, please do consider subscribing to my emails, or following me on Instagram!

Shop Stampin' Up! UK Teesside North East Stockton on Tees
Joining Stampin' Up! UK Starter Kit

To purchase any of the items featured in my projects please use the links above. To join my team of Stampin’ Friends select ‘Join My Team’ or send me a message!

Sign up to my newsletter for weekly updates from me!

Hannah McCurley

Technique Tuesday | Watercolour with Nature’s Prints

Hello! Welcome to StampinByHannah today for a fun Blog Hop; a watercolour themed Technique Tuesday, perfect for Watercolour Month! Stampin’ Up! are celebrating all things watercolour this month and there are a heap of videos and project inspiration over on their socials…. time for us to join in and share some watercolour projects too!

Watercolour wash with Nature's Prints from Stampin' Up! with StampinByHannah

I have been dying to try a watercolour wash with this stamp set since it arrived in my craft room, but for some reason I only managed to actually do it yesterday! This is the Nature’s Prints stamp set (and a piece of the Sun Prints Designer Series Paper), which I just love. The big leaf stamp is heat embossed in White onto a piece of Fluid100 Watercolour Paper, and then a wash of Night of Navy over the top. This is pretty strong watercolour, not a lot of water and a couple of drops of Night of Navy straight from a re-inker.

How to make a watercolour thank you card using Sun Prints from Stampin' Up! with StampinByHannah

The sentiment is heat embossed in white, from the same stamp set, and this card is finished with a trio of the Classic Matte Dots.


Check out the Supply List for this card HERE!

Thanks so much for stopping by today, but beefore you leave StampinByHannah today, please do consider subscribing to my emails, or following me on Instagram!

Shop Stampin' Up! UK Teesside North East Stockton on Tees
Joining Stampin' Up! UK Starter Kit

To purchase any of the items featured in my projects please use the links above. To join my team of Stampin’ Friends select ‘Join My Team’ or send me a message!

Sign up to my newsletter for weekly updates from me!

Hannah McCurley


Technique Tuesday| Acrylic Block Stamping

Stampin' Up! UK Butterfly Basics Watercolour Stamping

Watercolour is BIG news at the moment in card-making. Watercoloured backgrounds and images are really popular. At Stampin’ Up!® we have a great kit featuring the watercolour look (Watercolour Wishes) and have several stamp sets that allow you to look like a watercolour master without any of the mess – which is awesome, but I love playing with ink and water! But I understand that it can be a tricky look to pull off.

Well, today I have  quick and easy watercolour background technique for you that doesn’t even need a paint brush!

Stampin' Up! UK Acrylic Block Stamping Technique Tuesday Video Tutorial

This technique is super simple, but as always I have created a video tutorial for you.

The new Basic Black Archival Ink is great for this technique, it gives a crisp true black image, great for sentiments and silhouette images like the ones on the card above. But also it is awesome for watercolour techniques as it doesn’t bleed or run with water, and so has become my go to black for stamped imaged that I am planning to watercolour. This card would have worked just as well if I had used Memento or Stazon as the black stamping is done after the watercolour panel is dry.

My favourite card stock for this technique is the Shimmery White, as its slightly thicker than our standard Whisper White card stock, and allows you a little more time before the ink dries than Watercolor Paper. Plus, you get that lovely shimmery finish! I can see another packet of this coming home with me really soon!

Stampin' Up! UK Butterfly Basics Watercolour Stamping

Top Tips:

  • Pull out your Stampin’ Pierce matt to stamp on, to ensure a full block of colour
  • Ink up your Acrylic Block and stamp directly onto your card stock without water for a darker, more textured look
  • Add water to your inked Acrylic Block before stamping to create the watercolour effect
  • Allow the water to dry naturally, hit it with your heat gun, or dab off the water with a clean cloth for different effects
  • Stamp over your watercolour panel with a black inked imaged for a cool silhouette effect

The stamp set I have used on this card is Butterfly Basics – definitely one of my favourites this year – lovely for feminine birthdays and other occasions, and it coordinated with two die sets and several other sets of stamps too!


Stampin' Up! Starter Kit offer


Shop Now button-001Join my team button-001

To purchase any of the items featured in my projects please use the links above. To join my team of Stampin’ Friends select ‘Join My Team’ or send me a message!

Please support StampinByHannah, and join my Code Club, by using the Hostess code featured in the top right hand of my blog. For orders of over £150 please do not use this code, as you are entitled to your own Hostess benefits!

Sign up to my newsletter here – http://eepurl.com/2if59

Hannah Wilks

Stampin’ Up! UK Independent Demonstrator

Technique Tuesday | Colour Me Irresistible

Stampin' Up! UK Sprinkles of life colour me irresistible;l

I’m a bit concerned that this fantastic Designer Series Paper may have passed you by in the Annual Catalogue this year! It can be found at the very top of page 142, it just looks like a series of coloured chevrons – but take a closer look! Its the most wonderful Designer Series Paper – do you remember the Irresistibly Yours DSP from Sale-a-bration this year? Well, its like that – but better! You get 12 sheets, all with fabulous patterns in ink resist embossing, but some are pre-coloured, while others are white – all ready for you, a sponge and your favourite ink!

Stampin' Up! UK Sprinkles of life colour me irresistible;l

Paired here with the wonderful Sprinkles of Life Stamp set, I can’t choose which version of the paper is my favourite! The one on the left uses the pre-coloured Colour Me Irresistible paper, while the right had card features the DSP that has been coloured by me with my trusty sponge and some Mint Macaron Ink!

Have I mentioned about the Sprinkles of Life stamp set by the way? Not only is it super cute! but also £2 is donated to Ronald Macdonald House Charities here in the UK for each stamp set sold! Awesome right! RMHC do fantastic work, keeping parents and sick children close together during some of the worst times, providing houses near to hospitals.

Stampin' Up! Colour me Irresistable Color

What’s your favourite version of this card?


Shop Now button-001Join my team button-001

To purchase any of the items featured in my projects please use the links above. To join my team of Stampin’ Friends select ‘Join My Team’ or send me a message!

Please support StampinByHannah, and join my Code Club, by using the Hostess code featured in the top right hand of my blog. For orders of over £150 please do not use this code, as you are entitled to your own Hostess benefits!

Sign up to my newsletter here – http://eepurl.com/2if59

Hannah Wilks

Stampin’ Up! UK Independent Demonstrator

Technique Tuesday|Layered Alphabet

Stampin' Up! UK Technique videos

I have a slightly different Technique Tuesday for you this week. I have been loving the Layered Letters Alphabet, I’ve used it for all sorts the projects this month – Catalogue bookmarks, my swatch book, and now my customer Thank You cards for July!

If you have placed an order this month, this card will be coming to you in the post at the end of the month! If you haven’t ordered yet…. you better get ordering to get one!

Stampin' Up! UK Layered Letters Alphabet

Aren’t they cute! Check out the video for some great tips about using this stamp set!

Top tips:

– Stamp your layering pieces first! get those rectangles and ovals onto your card – using different colours for each one looks awesome!

-Lay your letters out onto a clear block, to check your spelling! (particularly important if your dyslexic like me!)

-Position your letters onto the layering spots, stamp side down, and pick them all up in one go with a large clear block – this way you can stamp them together like one big stamp!

Do you have any alphabet stamp tips? Let me know in the comments section below!


Supply List

Built for Free Using:  My Stampin Blog


Dont forget to shop using the Code Club Code to receive some great FREE product!

XEQGUA4P

I will be closing this order on the 30th July 2015


Shop Now button-001Join my team button-001

To purchase any of the items featured in my projects please use the links above. To join my team of Stampin’ Friends select ‘Join My Team’ or send me a message!

Please support StampinByHannah, and join my Code Club, by using the Hostess code featured in the top right hand of my blog. For orders of over £150 please do not use this code, as you are entitled to your own Hostess benefits!

Sign up to my newsletter here – http://eepurl.com/2if59

Hannah Wilks

Stampin’ Up! UK Independent Demonstrator

Inlay Die Cutting

Stampin' Up! UK Crazy about you Hello You diecutting

I do love a great technique, and I have been playing with this one for a few weeks (and covering myself and my desk in the process!) but the results are fabulous!

Stampin' Up! UK Inlay die cutting

I have to admit that the picture here looks better than the card does in person, I have the card in front of me and I’m looking at gluey finger prints! but it’s still a cool technique – but keep that baby wipe on hand to keep yours hands free of glue (because you WILL make a gluey mess!)

See what I mean, gluey mess! I don’t edit my videos very often, only if I’ve had an interruption like the doorbell going or my phone ringing, and so you will always get ‘live’ bloppers! I hope you enjoy them!

The original ‘Hello’ card uses our brand new 2015-2017 In-Colours in Watermelon Wonder and Mint Macaron, while the video version is in Marina Mist (I’m still a little obsessed with this colour!). I’m loving the new In-Colours; took me a while to get used to the super bright Watermelon and Cucumber though! what great additions to our colour collection.

Stampin' Up! UK Crazy about you Hello You diecutting

How to Inlay die cut:

Using the Hello You thinlits dies die cut your chosen word in coloured card stock.

Using your Magnetic platform to ensure correct die placement, die cut the same word out of your Whisper White layering piece – remember that this is your card front to carefully place the die where you want the word to be at the end!

Make sure you keep the little pieces from the die cut, keep them safe! you will need them in a moment.

Apply your glue of choice (I use Snail) to the back of your Whisper White layering piece and attach it to your card front.

Using a 2-way Glue Pen apply glue to the back of the coloured die cut, slotting it into the space on the front of your card. I did try this with Tombow glue and made a huge mess!

Using your 2-way glue pen again apply glue into the holes in the die cut, slotting the Whisper White die pieces back into the die cut.

This gives you a completely flat card, great for posting! Awesome!


Shop Now button-001Join my team button-001

To purchase any of the items featured in my projects please use the links above. To join my team of Stampin’ Friends select ‘Join My Team’ or send me a message!

Please support StampinByHannah by using the Hostess code featured in the top right hand of my blog. For orders of over £150 please do not use this code, as you are entitled to your own Hostess benefits!

Sign up to my newsletter here – http://eepurl.com/2if59

Hannah Wilks

Stampin’ Up! UK Independent Demonstrator

Watercolour Stamping

As you may be able to tell I love watercolouring with my stamps; either sprintzing water onto my inked stamp, adding water to a stamped image or using my inks to colour an image, and I just couldn’t let this card onto the blog without a very short video!

Stampin' Up! UK watercolour butterfly basics

Isn’t this card just so pretty!

I do have a bit of a top tip for using that sentiment; use the top edge of the stamp to ensure your stamp is stamped straight, if you line the top edge of the stamp up with the top of you block when positioning, you can then line the block up with your card stock to ensure your sentiment is straight.

Stampin' Up! UK butterfly basics video tutorialHow to:

Cut your sheet of Early Espresso card stock in half, and fold in half to create your card base. Measure the front or your card and cut a piece of Stampin’ Up! watercolour paper to half a centimetre (or 1/4″) shorter and narrower

Ink the fern stamp up with Sahara Sand ink and stamp 3 times in the bottom right hand corner of your watercolour paper.

Ink you flower stamp up with Rich Razzleberry, and mist with water, the amount of water you mist the more the ink will move, causing the two different effects as seen above, stamp over the top of the ferns. Allow this to dry, either naturally or with the assistance of a heat tool.

Ink the postage label in Early Espresso and stamp three times around the flowers.

Stamp the sentiment in the bottom left using Early Espresso.

Mount the watercolour paper to the front or your card base using Fast Fuse adhesive.


Shop Now button-001Join my team button-001

To purchase any of the items featured in my projects please use the links above. To join my team of Stampin’ Friends select ‘Join My Team’ or send me a message!

Please support StampinByHannah by using the Hostess code featured in the top right hand of my blog. For orders of over £150 please do not use this code, as you are entitled to your own Hostess benefits!

Sign up to my newsletter here – http://eepurl.com/2if59

Hannah Wilks

Stampin’ Up! UK Independent Demonstrator


Stamp Thumping

Its Tuesday, Technique Tuesday! and I have a great technique for you this week!

Stamp Thumping

Now, I do not want you to go around hitting your stamps. Love them, treasure them, treat them well (clean them and condition them with Stampin’ Mist, please!) but this thumping technique is a great way to use your stamps with your Stampin’ Write Markers.

Stampin' Up! UK petal Potpourri

I love being about to get a variety of colour on one stamp. This technique works especially well with tree stamps (I think it would be gorgeous with Sheltering Tree or Lovely as a Tree), but I didn’t have any to hand, so I went with flowers instead. I adore this stamp, I love the whole set actually, Petal Potpourri is a great collection of flowers (and a doily) that coordinated with the fabulous Flower Medallion punch.

How to:

Select 3 colours of Stampin’ Write Marker – the image above uses Rose Red, Rich Razzleberry and Melon Mambo, whereas the video uses Crumb Cake, Soft Suede and Early Espresso

Make sure your stamp is clean (this is the step I missed! silly me!)

Select your lightest colour first, remove the cap from the brush top of your Stampin’ Write Marker and hold the marker near the cap of the opposite end between your index finger and your thumb.

Bounce (or thump) the side of the brush tip off of the stamp.

Repeat with other colour, misting the stamp with water lightly before stamping onto Whisper White card stock

Stampin' Up! UK stamp thumping technique tuesday


Shop Now button-001

Join my team button-001

To purchase any of the items featured in my projects please use the links above. To join my team of Stampin’ Friends select ‘Join My Team’ or send me a message!

Please support StampinByHannah by using the Hostess code featured in the top right hand of my blog. For orders of over £150 please do not use this code, as you are entitled to your own Hostess benefits!

Sign up to my newsletter here – http://eepurl.com/2if59

Hannah Wilks

Stampin’ Up! UK Independent Demonstrator