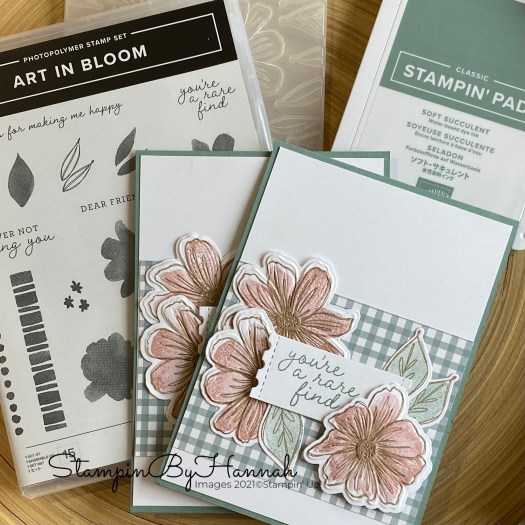
Hello! So sorry this post is a little later than usual, but this week has been the usual level of crazy in my house, and I got a little side-tracked. Anyway, better late than never right? This week’s Friday video uses the stunning Art in Bloom bundle. This fab stamp set has a coordinating die set AND an embossing folder that work together to make these pretty 3D florals. So fun!
This card also features a piece of the Pansy Petals Designer Series Paper, which is currently on sale for 15% off, along with a heap more packs of paper. Check all the items out HERE!
The cool thing about the Art in Bloom stamp and Hybrid Embossing folder bundle, is that you can cut and emboss at the same time but using the dies INSIDE the embossing folder! Isn’t that neat! Check the video to see how it works
Thought I would keep the blog post short and sweet for you this week, but before I go I just want to let you know about my Instagram account (https://www.instagram.com/stampinbyhannah/), where I post projects, sneak peaks and other fun things almost daily. I’d love to see you over there too
To purchase any of the items featured in my projects please use the links above. To join my team of Stampin’ Friends select ‘Join My Team’ or send me a message!
Sign up to my newsletter for weekly updates from me!
Ok, so while I work out exactly what is happening on a Friday, I thought I would share some techniques with you. Like I said last week, Fancy Fold Friday is having a little break (but if you have any fancy fold suggestions please do feel free to let me know!) and so Friday’s are a little different, But I still want to get 2 videos out to you every week, and this is what I have so far!
It was my anniversary recently, and this was the card I made my darling other half, James. He is totally used to receiving pink cards by now, and really doesn’t mind. But I just loved this technique and HAD to share it with you.
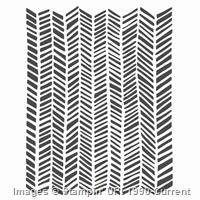
I think this background stamping technique is great. and really versitile too – might have a play at using some of my other background stamps too!
First Ink your stamp with a pale ink, I used Pink Pirouette, before inking a corner with the darker colour (Melon Mambo in my pink example!). Then take a mircofibre cloth – a crafty must have! – dab away the mark between the two colours, blending them on the stamp. Take your Whisper White cardstock and lay it over the inked stamp, apply pressure across the piece, and carefully lift away to reveal the gorgeous Ombre effect!
If you like the project, or any of the products used, would like a catalogue, or to join my team, please contact me, or click on the ‘Shop NOW’ button at the top of the page. You can also find me on Twitter, Facebook, YouTube, Google+, About.me, and Tumblr (Links in the sidebar)
I’m loving the selection of Sale-a-bration items this year! So many stamps to choose from, let alone the Designer Series paper, Accessory pack, Project Life, or the great selection of Blendabilities!
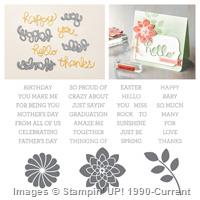
This week I decided not to make a card but that I would show you how I stamp the Lotus Blossom instead.
This is a great stamp, its really lovely. But as its a 3 step technique it can be a little tricky to get right. Stampin’ Up! have kindly not only numbered them in the order to stamp, but also provided us with an arrow to help us get the stamps lined up together.
I have tried a number of different variations of this stamp, and personally prefer to stamp the first two stamps in the same ink (stamping off once for the second stamp), before changing to a different ink for the 3rd and most solid stamp. But it really is personal preference.
These are just a selection of the combinations I have tried. I have to say, although purples are my favourite, I wasn’t over keen on the Elegant Eggplant / Perfect Plum combinations of the blossoms on the left. The first one I felt was too dark, I did try again, stamping off the Perfect Plum once for my final layer, but I’m still not all that fussed. The blue blossom on the other hand is lovely! Stamped in Marina Mist and Soft Sky (definitely a favourite colour combination of late, have you noticed the new look here by the way!) while the yellow version uses Daffodil Delight and Crushed Curry.
I have to say as well that this is one of my favourite things about Stampin’ Up! being about to try out loads of different colour combinations, this is one of the times I pull out my Colour Coach. On the back of each card is a complimentary colour, so you (almost) always have a colour combination for a great tone-on-tone look – great for stamping the Lotus Blossom!
I know there are loads of tutorials and demonstrations available on the many ways to use the Lotus Blossom, I think I will try getting all 3 layers with one ink pad next.
Don’t forget Sale-a-bration runs from the 6th of January through to the 31st of March – and you can choose a free item with each £45 spent! Which means that if you spend £90 you can choose 2 items! How awesome! You can find the Sale-a-bration product HERE
Hannah Wilks
Stampin’ Up! UK Independent Demonstrator
If you like the project, or any of the products used, would like a catalogue, or to join my team, please contact me, or click on the ‘Shop NOW’ button at the top of the page. You can also find me on Twitter, Facebook, YouTube, Google+, About.me, and Tumblr (Links in the sidebar)
Ok, I have a confession to make. I have a problem. I (along with James) cannot leave anything Complimentary in a hotel room!
Recently I had a night away with James, really it was a Stampin’ Up! event, but we turned it into a romantic mid-week break. I love staying in hotels, and seeing as we haven’t had a holiday in a couple of years , we take mini-breaks instead.
But every time we stay away we come home with the hotel complimentary toiletries!
I try and use them up in the gym, but James challenged me to make a bag / box to put them in this time, and seeing as its almost Christmas, and I’m sure I’m not the only one who has a similar problem, I though you could make these as pillow gifts for you house guests over the festive season!
These are super cute! Don’t you love vellum! and metallic ribbon! These use the Satin Ribbon in Gold and Silver!
Measurements:
Vellum – 6 1/2 x 9″ (
Score on the long side at – 1 3/4, 4 1/4, 6, and 8 1/2 (
Score on the short side at – 1 3/4, 4 3/4, and 6″ (
DISCLAIMER – I hold no responsibility for any damage caused by anyone using my Satin Ribbon Top Tip! Use this tip with GREAT care, and hold your ribbon as far away from any cardstock/paper/vellum or any other material as you can! Never leave a lighter with a child!
Hannah Wilks
Stampin’ Up! UK Independent Demonstrator
If you like the project, or any of the products used, would like a catalogue, or to join my team, please contact me, or click on the ‘Shop NOW’ button at the top of the page. You can also find me on Twitter, Facebook, YouTube, Google+, About.me, and Tumblr (Links in the sidebar)
Mass production of cards can be difficult. I find that producing a small number of the same card makes it easier, doing say 8 of each colour for example.
Recently I have been making Wedding Invitations (150 of them actually) and although I have broken them down into batches, there are a number of other ways of making the ‘batch cardmaking’ process a little easier.
1. do all of each step all at once eg: cut ALL the pieces for ALL the cards, then do ALL the scoring, ALL the stamping etc.
2. do it in smaller batches. I found that once I’d made about 40 invitations I was ready to give up all together, so instead, I did 30-35, and stopped for a while (admittedily, this only works if you have plenty of time!)
3. Change it up. Generally I do 6-8 of the exact same card before I change something, either the colour, or placement of the stamped images, use a different punch, etc.
4. Grab your nearest and dearest to help! not something I have ever tried, but thats more because James is not crafty at all, and I’m not sure if Freda the Cat is much good with a paper trimmer!
So, here’s my offer to you: place an order of £20 or more (there are many ways to order, use the contact me page if you are stuck), and get one of these super cute thank you notes, plus a special little something! (I’m not telling you what – you’ll have to order and find out!)
What could you get for £20? take a little look below (click on the image to go to my shop from where you can purchase!)
If you like the project, or any of the products used, would like a catalogue, or to join my team, please contact me, or click on the ‘Shop NOW’ button at the top of the page. You can also find me on Twitter, Facebook, YouTube, Google+, About.me, and Tumblr (Links in the sidebar)
Stampin’ Up! Inkpads are all very special. The Formulation of the ink is like no other. Its great for line stamping (so for sentiments and images with lots of open space) and for more solid stamping (those stamps that have no open space at all). As Stampin’ Up! ink dries the image ‘flattens’ out so that image you stamped that looked a little blotchy is sudden as smooth the cardstock underneath.
Also all the ink pads have refils available, so you only ever have to buy the inkpad once! and they coordinate with our Stampin’ Write Markers, Blendabilities (Coming soon!), cardstock, designer series papers, Project Life cards, and many embellishments! This means that not only can you stamp great images, but you can fully coordinate your projects!
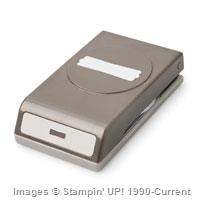
The thing is however, that the design of the inkpads themselves mean that when they are stacked, or put into a storage system (such as THIS ONE!) you cant see which colour is which! Stampin’ Up! have carefully negotiated this issue by supplying stickers with each pad. Take your shiny new ink pad out of the cellophane and turn it over! There you will find, attached to the bottom of the pad, 4 stickers, stating the colour of the inkpad (one in each of our four main languages; English, Spanish, French, and German). Peel the sticker sheet off of the bottom of the pad, and the select the correct sticker for you! Then is the tricky bit, getting the sticker on the inkpad!
I have found the easiest way to do this is quickly! Hold the sticker at both ends, the inkpad will balance on one end for long enough for you to line up the sticker, making sure its only on the lid of the pad (not across the lid and the base – you’ll never get into the ink!) and press it down firmly.
Now your inkpad is labelled with the colour on the front edge, making for much easier identification!
If you like the project, or any of the products used, would like a catalogue, or to join my team, please contact me, or click on the ‘Shop NOW’ button at the top of the page. You can also find me on Twitter, Facebook, YouTube, Google+, About.me, and Tumblr (Links in the sidebar)

")


 Designer Series Paper")